Sunday, April 21, 2019

Far too busy . . .

to do much modeling.  Dr. visits, are the worst culprits, as it's ~30 miles each way.  So much for living in an idyllic small town.

The fan is mounted, but no pictures yet.  It's almost dry enough (after 2.75" rain the other night) to do some yard work and fence repairs.  Humbug. 

For some time now, I've been doodling a small switching layout that's spread across some small islands, The Trans Topics Rwy.  Or, as the natives call it, the "Taki-Tiki Rwy."  It is designed in Tomix Fine Track.  I do have a stock on hand. This leads into the rest of this blog:

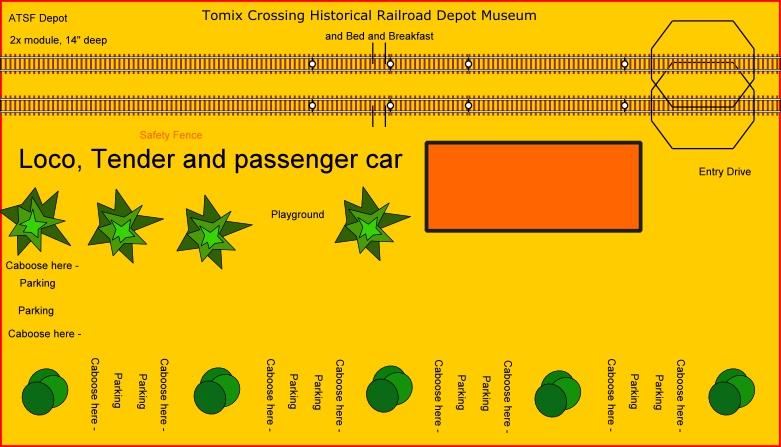
Joshua Murrah, on the TTrak Facebook group, posted something about building a small yard on the rear part of a module for use by Bandai Shorty trains.  Well, since I do have some, one thing led to another.  after a couple preliminary drawings, I came up with one which seems very achievable.  Note that each of these is 930mm (~3') long and 350mm (~ 13 3/4") deep, just less than an Alt corner.


By using mostly C103 (mm, 4")  curves it turned into a small yard complex, and perhaps a town.  I did look at interleaving the yard tracks, but like them better this way.

To go with it, another was laid out.


It features the same basic loop and TTrak inner line interface as the first.  Here, I used a pair of crossing sidings and a possible view block.  By this time, I was beginning to see these as portable micro layouts.  Something for a quick and easy show for a 1/2 day at an elementary school.

The late Carl Arendt defined a micro layout as one with not more than 4 sq. ft. of area.  That's 576 sq. in.  These are ~505 sq.in.  Of course, he was thinking in larger scales, such as Gn15, but his definition does not restrict the scale of train used,  only that it's not a static scene.  It must DO something.  Check out carendt.com, his website that is still being maintained.  Very informative, it is.

After looking at this, I stuck the two together, and ...


This looked like a bit of fun, and since AnyRail does export to TrainPlayer, I did that.  A couple of fun evenings later, I left it like this:

Look closely. There is a train (steam, with caboose, of course) and a freight car on each siding.  Every freight car started out where the train sits, and was moves and switched into the resting location. 

Yeah, I already have far too many projects, but these have inserted themselves rather high in the "to-do" list.  Perhaps, the Taki-Tiki is coming to life?


Friday, April 12, 2019

Sniffing Glue

That's something I'd rather not do.  So, in my "office" (a spare bedroom) I have an access panel installed in the window.


One of my other hobbies is shortwave radio (including ham (amateur) radio.) The original purpose of the panel is to provide a number of antenna and cable connections between the (comfortable) inside and the (constantly changing) outside world.  It's a commercial product available at most ham stores.  After trimming it to fit my window, I stared at the blank end for a long time. 

It finally dawned on me (I can be a bit dense - no comments, please) that perhaps a pass-through for a vent could be added.  I cut a hole for a piece of 2" PVC pipe, and glued it in place.  A 45º elbow was added inside and outside.  The inside faces up, while the outside faces down to not catch rain. (Another 2" is forecast for tomorrow. Good - the moss in my grass was about to wilt. 😐)

The outside port is equipped with a stainless PVC screen to keep out bugs and insects.  I found it online - where else?


On the inside, I keep a cap pushed on to close the air flow when not wanted.  Then, I went spelunking in the depths of the barn for a muffin fan.  I found a couple 4" 110VAC fans.  So, a 4" to 2" PVC reducer was obtained.  A thin piece of plywood was cut to about 5" sq. and a 4"hole cut in the middle. This is attached to the reducer with small 90º angle brackets and #6 hardware.


Before it's finished, I will caulk around the joint to seal the air flow.

Finally, the fan will be mounted on the plywood adapter. Once I make another trip to a hardware store in the next few days, that is.


To use, I'll pull the cap off and push the fan assembly onto the interior end if the pipe through the window.  A bit of foam-core board will make a small fume hood.

I won't try painting with this, I just want to pull the glue fumes outside.  Since most of the items are small (N scale buildings, etc.) I don't think a big, space hog of a hood is desirable.  I do plan a test using match or candle smoke to see if it draws as well as I hope.  I'm just wanting it to be enough to control the fumes.

With all the tasks and Dr. visits, that's about all there is for this week.  I hope the rain holds off long enough for me to apply the "weed-n-feed" in the morning.  We'll have to see how that develops.

Sunday, April 7, 2019

Sunday Boredom

With nothing much worth watching on the small tube, I drifted to the PC and dug out some Industrial Park pictures.  So, here's a brief review of how I got to this point.  All this happened before we moved to Grayson county, TX, in 2016.  Its been in storage since, but not for much longer.

First was Phase I.  At the beginning, this was all I had planned, a single, 2X (two-unit long) module. Ha.


I wanted a couple sidings, one off each main line, so this happened. Just as soon as both sidings were clear of the main lines, I converted to Tomix track.  It has a smaller roadbed, and looks like a lighter rail siding/spur line. I like it.


The siding from the Inner line dives between two buildings of one company, so a catwalk between them was deemed necessary.  When people have noticed it, they always call to someone else to "come look at this."

The Outer line siding crosses the Inner on its way to a manufacturing building where the blue box car is parked.  More about this in a bit.

The Inner siding seemed incomplete, and "needed" some place to go.  So, another 2X, Phase II was added. First, an overview of Phase I & II:


Then, Phase II:


And a couple detail shots:


This siding splits, with one track for the warehouse, and the other to a loading dock.  Also, the isolated siding was incorporated, just to add visual interest.  The front crosses the mains, and the rear of it ends, hidden behind the red building. Well, a friend made some comments about the isolated track, and one thing lead to another. 

About this time, I decided to join these two modules into one long unit, mainly because the siding turnout laid across the module gap.  This resulted in a single four-unit long module.  Now, I have a pickup truck, so transporting it is no problem.

Back to the friend's comments.  I did some more drawings, and developed Phase III.  It's also a 4X module.


Phase III consisted of a passing siding, with a branch to the rear to join the isolated track, making it available. 


The three track yard was then incorporated as Phase IV.  With a mixture of Kato, Tomix and Atlas pieces, the crossing shown has been a challenge to complete. 

In the background is a loading dock beside the third yard track.  It was easy. I took an extra Kato passenger terminal platform, and ripped it with a bandsaw. Instant dock!

Finally, back to the Outer siding in the first picture. A turnout was added to allow servicing the red plant and still allow free access to the yard.  The tracks were securely glued in place, then cut apart at the module boundary.


This thing sure took on a life of its' own.  But, while not shown, it's a little track work and a couple of structures from being finished. Knock on wood.


Friday, April 5, 2019

The Industrial Park arises

A number of years ago, I build a 14" deep double module as a small industrial park. The right module is the original idea.  Well, anyone who knows me knows that often I can't leave well enough alone.  The left module was added, to allow the Inner track siding (made with Tomix track) to go somewhere and do something. 

On a whim, I guess, I added the rear track (Tomix also) as a place for a static show line.  It was run in this configuration at several shows. Its curve is 140mm.


That was fine, UNTIL a fellow Lubbock modeler who shall remain unnamed (right, BJ?) said something about it ought to be made operational. Gee, thanks, fella.  He knew that if he planted the germ, I'd be infected until I at least tried it out.

The start of more expansion caused these two modules to be permanently bolted together as a quad module.  Then, Phase 3 & Phase 4 was initiated as a single quad module. 


Since the space was available, I incorporated the small passing siding/run around, and dropped the connection off that.  It has been a challenge, and still needs a bit of track work, especially at the crossing. 

The crossing resulted from extending the Outer track siding and reaching a small three track yard.  This area has a mixture of Tomix, Kato and Atlas track pieces.  Then, a turnout was added to the lead, to the left of the corssing, to service a warehouse and provide yard access.

Much of this eight feet of modules has been sceniced, with a modest amount to go.  The main item is a water tower just "north" of that crossing. I seem to have lost my pictures of the modules.

Here's the "final" plan:


Getting back to the recurring theme of this blog, the siding that loops and crosses the main lines was the inspiration for the 6-module set with its' wye.
The connection to the Taki-Tiki is an afterthought, but I do like it.


Here I show the I.P. without other modules, but it would be part of a larger TTrak layout.

Yeah, I get these headaches every once in a while . . .

Wednesday, April 3, 2019

More buildings for the 6-module set - and miscellaneous dreamings

I broke down and ordered a pair of building kits.  Both are Walthers.  The first is the "Merchant's Row I" which will go okay with the "Merchant's Row II" already on hand.

Then, I added the "Hole-In-One Donut Shop."  A recently deceased friend (from 400 miles away) used one in a scene, surrounded by police cars.  I'm wanting to remember Ken by copying his lead.

Speaking of a module set, I did one a long while back that was to be built as a series of tropical islands, connected by single track bridges or trestles.  I did some mock-ups of it with Tomix track, and ran a few trains on it.  The set is named the Trans-Tropics Railway, but the locals call it the Taki-Tiki.  It's basically a 3-way junction (on a volcano island) with a couple other islands, then ending in three return loops. DCC, or DC with a lot of attention being paid to running it.

I have test run Atlas 4-6-2's on C140mm (5.5") radius curves: 

https://www.youtube.com/watch?v=sfKF7usw9gw

So this is YAP (Yet Another Project) that keeps rearing its' head, refusing to go away.  At any rate, I took the Taki-Tiki and removed one end loop.  Then, a long bridge later, it was connected to the wye port on Module #4.  Since I have TrainPlayer, it was exported from AnyRail to TrainPlayer and test run on the computer.  Oh, I do think I'll have to build at least the long trestle and an end loop, just for the fun of running it.

Here's a drawing of the whole mess.  If anyone has TrainPlayer and wants the files, let me know.
And, no, I'm not smoking or drinking anything . . .


Monday, April 1, 2019

Some module musings ...

A recent post on the TTrak-N Facebook thread by Joshua Murrah brought up the idea of a small, separate loop along the back of a 14" deep module, specifically for the Bandai Shorty series of trains.

Well, I couldn't leave well enough alone.  First, I drew (in Anyrail) my version of his idea, and posted it there.


Like his ideas, it fits on a triple length module.  That wouldn't be my first of that length, so no problem there.  Then, I massaged it a little more, to tie the loop to the inner TTrak line.  It was fairly easy.

The interface is almost all Tomix track, with Kato to "Fleishmann" adapter (20045) sections at each end.  If you look back at my 6-module loop, all of the wye trackage is Tomix.  It works great, just needing a thin plastic shim to meet Kato roadbed height.

So, now I have a triple, a double and a single length module to add to the collection.  The double is an AT-SF terminal as a museum, with several cabeese for a B-and-B. 


A stuffed and mounted steam loco (a dead Bachmann) and a heavyweight car are a part of the scene.

The single is a scene of "bomber Gas."  Go search for it - an interesting true story.  I have a Minicraft B-17G in 1/144 scale. Close enough.

All this, as if I didn't have enough going on.  Oh, well, ...